Stonewards Gameplay Guide
How the dig-forge-defend loop actually works: wave structure, forge economy, mine timing, and surface survival in practice.
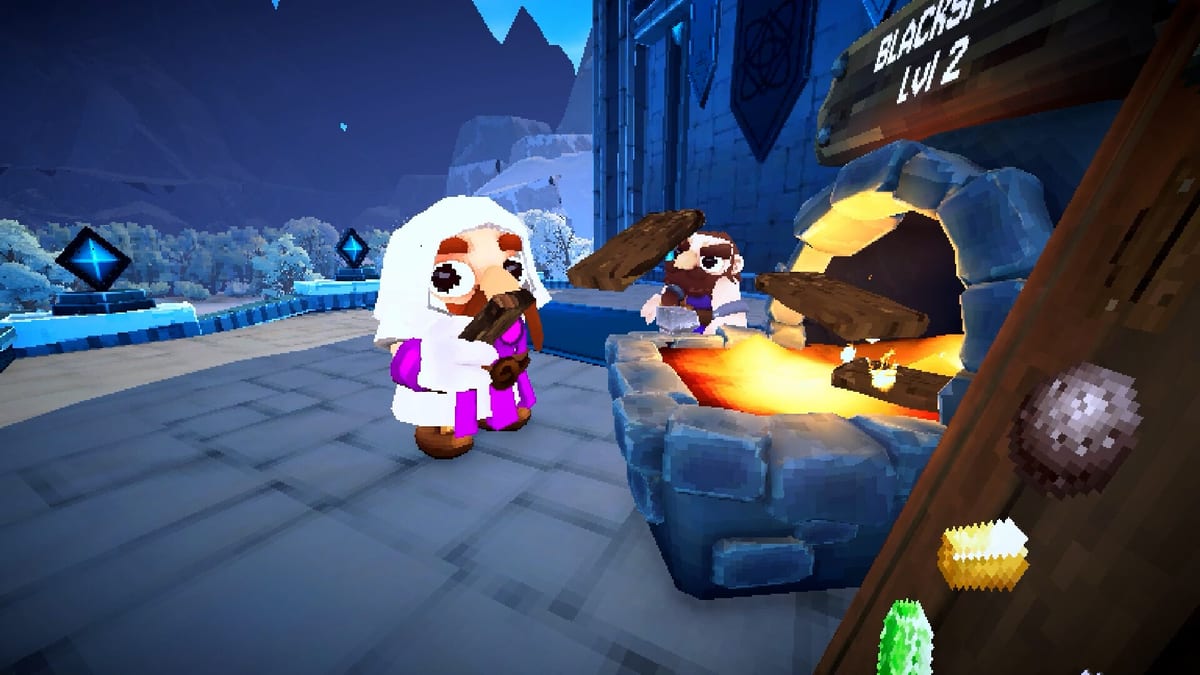
Stonewards gameplay centers on a repeating three-phase cycle: defend the bastion during monster waves, descend into procedural caves to mine ore, then spend that ore at forge stations to craft ammunition, repair walls, and pick upgrades before the next assault. The loop sounds simple on paper—dig, forge, defend—but the pressure of escalating waves, limited mine windows, and randomized forge offers turns each run into a escalating resource management puzzle. This guide breaks down every phase of the loop so you understand not just what to do, but why each decision matters when the King is taking damage.
The Dig-Forge-Defend Loop in Practice
Banana Tiger Studio designed Stonewards so that underground mining and surface defense are not separate mini-games—they are two halves of one schedule. A miner who returns late leaves defenders one player short. A forger who spends ore on luxury upgrades instead of arrows leaves the team dry mid-wave. A defender who never descends starves the forge of materials. Every role in Stonewards is ultimately one loop, and the teams that survive longest are the ones that synchronize both halves without either player type burning out.
The cycle in order:
- Wave — Horns sound, monsters spawn, defenders hold walls and the King.
- Mine window — After the wave clears, cave entrances open. Miners descend.
- Forge phase — Players deposit ore, craft ammo, repair walls, vote on Bonus Cards, and choose upgrades.
- Prepare — Weapons loaded, positions set, countdown to next wave.
Repeat until the King dies or the mission succeeds. There is no scoreboard—just survival.
Wave Phase: Horns, Spawns, and King Safety
Monster waves in Stonewards follow a predictable escalation pattern documented across Steam Next Fest playtests and Early Access demos. Early waves teach one lane discipline with grunts and basic wall breakers. Mid waves introduce flanking rushers and ranged units that punish defenders who do not rotate. Later waves stack elite threats on top of grunt pressure until the economy breaks under the weight of too many simultaneous demands.
The King sits inside the bastion throne room. Monsters path toward him through the weakest open segment—which means wall integrity is not just a structural concern, it is a direct threat metric. When players talk about wave defense, they are really talking about King health management: keeping his corridor clear, keeping his walls standing, and keeping ammunition flowing to the players who hold chokepoints.
The horn sounds before each wave spawns. That audio cue is your mine-cutoff signal—if you are underground when the horn fires, you are already late.
Mine Window: Routing, Node Priorities, and Return Timing
The mine window lasts from wave clearance to the next horn. Its length varies by mission tier and wave number, but the defining constraint is not depth—it is time. Players who chase rare nodes into deep branches frequently surface to find their team fighting a four-player wave with three defenders.
Node priorities depend on your current economy gap. If you have no arrows, iron ore and stone take priority. If walls are intact but the forge has not offered upgrades in three turns, rare metals matter more. The How to Mine Fast guide covers routing in detail; this page covers the strategic logic.
Return timing rules:
- Horn audio = start surfacing. Do not finish the current node. Leave immediately.
- Never solo mine during a wave. You cannot help defend if you are underground.
- Call your ETA in co-op. “Surfacing in thirty seconds” lets defenders plan fallback.
- Deposit first, then re-descend. If the window is long enough, two trips beat one overloaded haul.
The How to Co-op in Stonewards guide has full callout protocols for groups.
Forge Phase: Stations, Choices, and Opportunity Cost
After each wave, the bastion stations activate. Players queue at the Blacksmith to spend ore on randomized upgrades, at the Crafting Camp to produce ammunition, at Wall Repair to patch the segments monsters attacked, at the Recycling Camp to trade surplus gear, and at the Chest Opener for team-wide buffs. The Campfire offers healing and resurrection between waves.
The central forge decision is not “what is best”—it is “what is most urgent given what is threatening the King right now.” An empty quiver mid-wave kills more runs than a missing ring upgrade. A fully repaired wall with zero arrows kills more runs than an unrepaired wall with a stockpile. The forge rewards players who prioritize survival over power.
Upgrade randomization means every run has different options. The Forge Upgrades page documents common categories and how to evaluate them under pressure. The Upgrade Tier List ranks the most consistent picks.
Bonus Cards: Team-Wide Choices Between Waves
After each wave clears, all living players vote on a Bonus Card—a team-wide buff that lasts until the next extraction or King death. Options include campfire regeneration bonuses, extra ore from deposit nodes, reduced crafting costs, and movement speed boosts. The vote happens at the Campfire station and requires agreement from all team members.
Bonus Cards do not replace forge upgrades—they complement them. A team running low on healing might vote for campfire regen. A team with full ammo but fragile walls might vote for wall repair speed. Reading the current run state and choosing the card that solves the most urgent problem is a skill that improves with every run.
Solo vs Co-op Gameplay Differences
Solo players handle all three phases alone. There is no one to call for backup when a wave breaks through, no one to cover your mining window, and no one to share forge costs. Solo survival in Stonewards depends heavily on mine discipline: shorter trips, earlier returns, and accepting that you cannot mine everything in one window.
Co-op distributes the load but adds communication overhead. The most common co-op failure is not bad aim or weak upgrades—it is one player staying underground too long while the others face a full wave short-handed. Voice callouts, agreed return timers, and role clarity prevent more wipes than any forge upgrade.
Both modes share the same King-death fail condition and the same fundamental loop. The How to Co-op in Stonewards guide covers team protocols in depth.
Mission Structure and Wave Escalation
Each mission sends the team to a threatened bastion with a set number of waves before extraction becomes available. Wave count varies by mission tier—harder missions have more waves and shorter inter-wave windows. After the agreed wave milestone (commonly wave eleven in public demos), the team chooses between entering endless mode—continuing waves for extra meta rewards—or returning to the hub to bank progress.
Endless mode scales enemy health and spawn density with each additional wave. The Endless Mode Strategy guide covers blacksmith level scaling and economy decisions past the extraction choice.
Gear, Weapons, and Class Interactions
Each class in Stonewards starts with different baseline gear. Weapons and Gear covers class loadouts and how starting equipment influences early forge priorities. Forge upgrades stack on top of class gear, so a Warrior with good knockback upgrades and a full quiver behaves very differently from a Warrior who spent all ore on armor rings.
Rings and Relics are limited to four choices per forge visit. The blacksmith presents four ring options; players pick one. The chosen ring slots into one of four available slots. Relics provide passive bonuses that persist through the run.
What Happens When the King Dies
King death ends the run immediately for the whole team, regardless of how many players are alive or how much ore remains in the forge. This is the non-negotiable fail condition that makes every other decision in Stonewards urgent. The King cannot be resurrected mid-run. The only path to victory is keeping him alive through every wave, which means keeping walls standing, keeping ammo flowing, and keeping defenders at their posts.
After a run ends, the team returns to the hub. Hub currency, mission unlocks, and character progression persist between runs. How to Use the Hub explains meta progression and what to spend hub currency on first.
YouTube Gameplay Reference
The embedded Stonewards demo footage above shows the dig-forge-defend loop in action during an actual run. Watch how the player balances cave time against wave pressure, how forge choices are made between waves, and how the team communicates during the horn countdown. Footage reflects the public demo build; Early Access runs follow the same loop with additional content and balance adjustments.
Recommended Reading Order
- How to Play Stonewards for the broad wave-and-economy picture.
- How to Mine Fast for underground efficiency.
- How to Defend the King for surface survival.
- Forge Upgrades for ore spend categories.
- How to Co-op in Stonewards for team callouts.
- Tips and Tricks for efficiency habits.
- Wave Prep Planner for a checklist before each horn.
The loop is learnable in one session. Mastering it takes dozens of runs. Start with short mission tiers, accept early King deaths as tuition, and build habits one wave at a time.
Frequently Asked Questions
Quick answers to the most common Stonewards questions.
What is the core gameplay loop in Stonewards?
The dig-forge-defend loop: defend the bastion during monster waves, mine procedural caves for ore between waves, then spend that ore at forge stations crafting ammunition, repairing walls, and picking upgrades before the next assault.
How do I know when to stop mining and return to the surface?
The horn sounds before each wave spawns. When you hear it, start surfacing immediately—do not finish the current node. Returning late leaves defenders short-handed during the wave.
What should I spend ore on first at the forge?
Priority order: arrows and baseline ammunition first, then wall repairs on the segments monsters attacked, then upgrades. An empty quiver mid-wave kills more runs than a missing ring.
Does gameplay differ between solo and co-op?
Solo requires you to handle all three phases alone—mine, forge, and defend—with no backup. Co-op distributes the load but demands communication: late miners are the most common cause of co-op wipes.
What happens when the King dies?
The run ends immediately for the entire team, regardless of how many players are alive or how much ore remains. King death is the non-negotiable fail condition in every mode.
When can I choose between endless mode and returning to the hub?
The extraction choice typically appears after wave eleven in standard missions. Endless mode continues scaling waves for extra rewards; returning to the hub banks your current progress. See [Endless Mode Strategy](/combat/endless-mode/) for the full tradeoffs.